Easy Steps and Instructions
You have recently purchased labels from L.G Business Systems but you are uncertain how to design and print them without making any mistakes. No worries!
Here are the answers to the FAQ in steps and instructions.
How Do I Print Your Labels?
The majority of all our labels are Avery compatible, so the standard layout will be automatically uploaded onto any Microsoft Word label programme. Check the product code on the back of the box that you have purchased and you will find the compatible Avery code underneath.
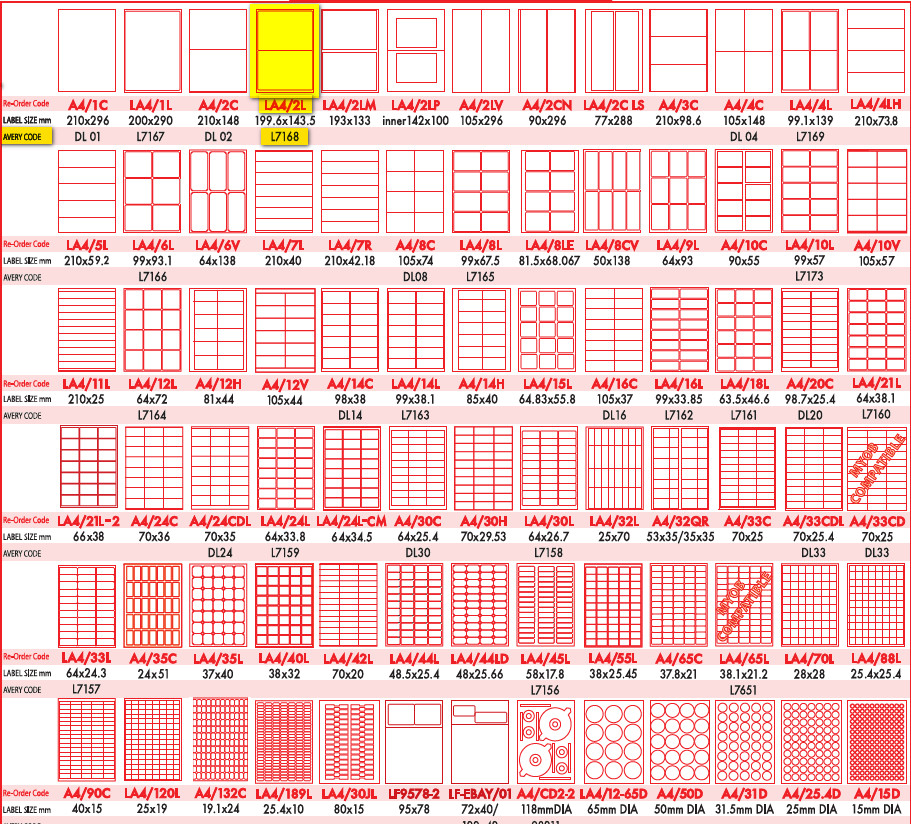
You can see the highlighted product shows the Re-order Code and layout of the labels you have purchased and then the compatible Avery code directly underneath.
Then, when you want to create your labels, open up the Microsoft Word software on your computer.
Go into ‘Blank Document’ and choose the ‘Mailings’ tab at the top of the screen.
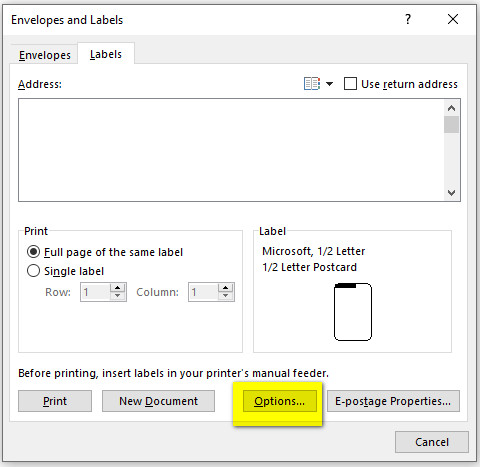
You can then choose the ‘Labels’ option underneath.

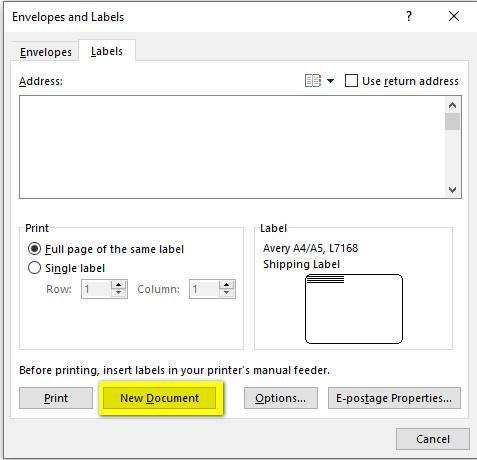
A box will appear and you can click on the Options button to bring up your choices of label size.
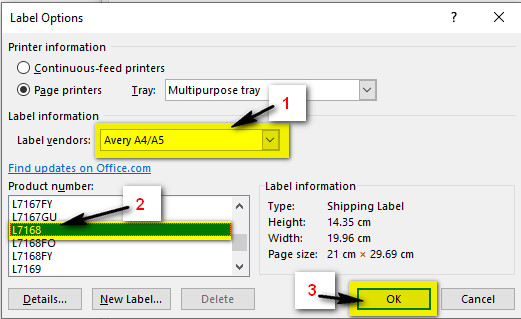
Firstly make sure you choose the correct Label Vendor. So, this needs to be changed to ‘Avery A4/A5’
Then, you can scroll through and find the compatible Avery code that matches your chosen label size, as stated on the back of the box.
Then hit ‘OK’
Next, it will take you back to the original screen, and you need to hit ‘New Document’ and the label layout template will appear!
Finally, away you go with designing your label!
What if my label is not Avery Compatible?
If your chosen label does not have an Avery compatible code then don’t worry! You can still design your labels onMicrosoft Word!
Again, follow the first steps of choosing the ‘Mailings’ and then ‘Labels’ tabs.
Firstly choose ‘Other/custom’ label vendor.
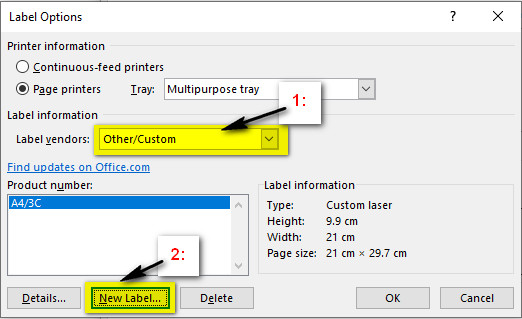
If this is not initially available, then keep the choice on ‘Microsoft’. Then, hit the ‘New Label’ button.
You will then be able to fill in all the required details for the labels you have purchased – see ‘label details’image attached.
How do I know what measurements to put into the Label Details section?
Take a ruler and make the following measurements:
Tip: If it is hard to tell where the labels are cut on the sheet for measuring, then peel 1 label away so that you can easily see the glassine backing which will make measuring easier.
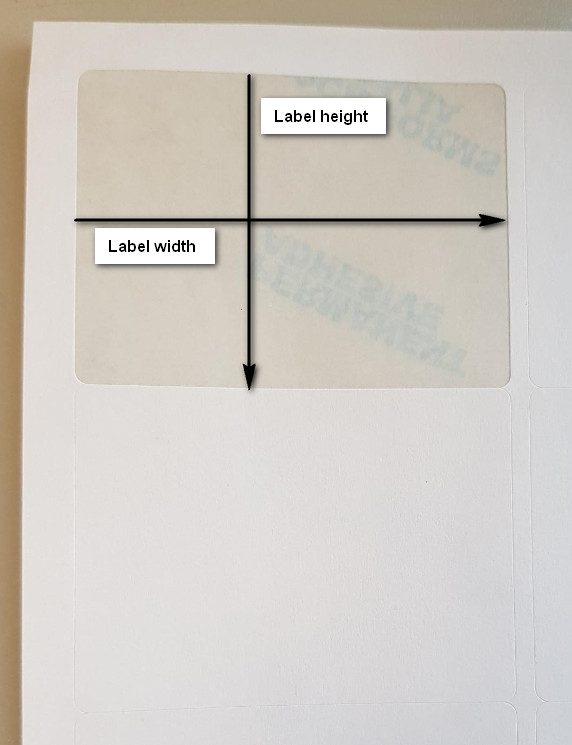
Label height: This is the measurement from the top to the bottom of the label
Label width: This is the measurement from one side of the label to the other side
Top margin: This is the measurement from the top of the sheet to the top of the first label.
Side margin: This is the measurement from the side of the sheet to the side of the first label.
Vertical pitch: This is the measurement from the top of the first label to the top of the second label underneath.
Horizontal pitch: This is the measurement from the far side of the first label to the far side of the next label.
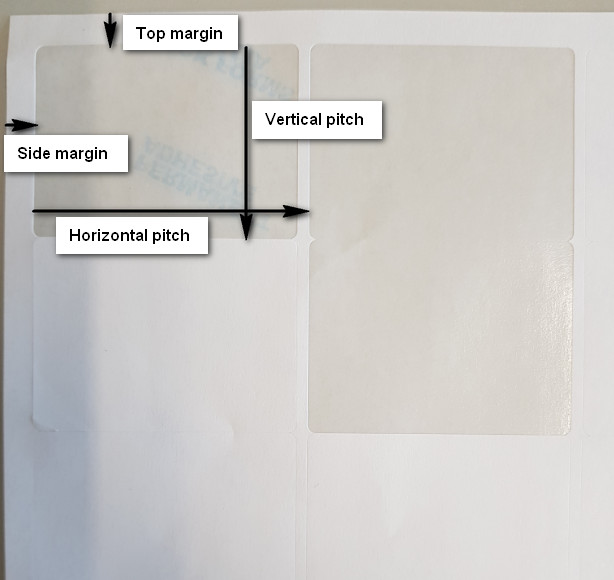
Labels have been peeled away for viewing purposes only.
Make sure you change the page size to ‘A4’ and once finished, you can enter the Label name as the same re-order code that was on the box. Then hit ‘OK’. This will now save this label setting for you to use in future.
Do you have any other questions or require further explanations? Contact us at https://lgbusinesssystems.com.au/contact